-
By:
- elizabeth
- No comment
olympus om10 user manual
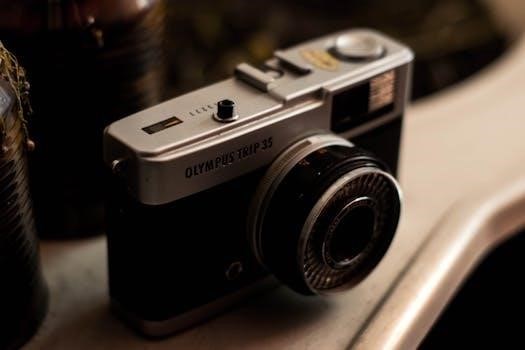
Olympus OM10 User Manual⁚ A Comprehensive Guide
Welcome to the comprehensive guide for the Olympus OM10, a classic 35mm SLR film camera celebrated for its user-friendly design and excellent image quality․ This manual provides essential information and instructions․
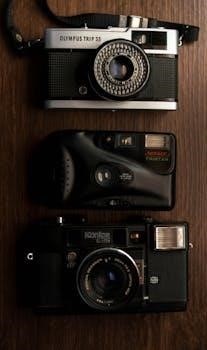
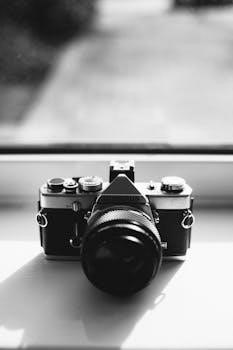
The Olympus OM10 is a single-lens reflex (SLR) film camera renowned for its blend of automation and manual control, making it an excellent choice for both beginners and experienced photographers․ Introduced as part of the Olympus OM system, it offers access to a wide range of high-quality Zuiko lenses and accessories․
Its electronically controlled automatic exposure system prioritizes aperture, simplifying the process of capturing well-exposed images․ For those seeking more creative control, a manual adapter can be attached, enabling manual selection of shutter speeds․ The OM10’s compact size and robust construction make it a reliable companion for various photographic endeavors․ This guide will walk you through the OM10’s features, operation, and maintenance, ensuring you get the most out of this classic camera․
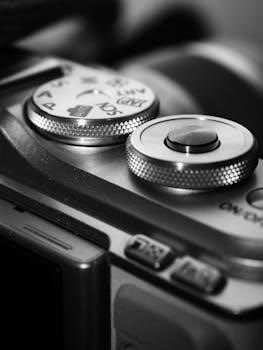
Camera Overview
This section provides a detailed look at the Olympus OM10․ Here, we will explore the external components, internal mechanisms, and overall design that define this classic 35mm SLR camera․
Key Features and Specifications
The Olympus OM10 boasts several key features, making it a standout SLR camera․ Its aperture-priority automatic exposure mode simplifies photography, allowing users to focus on composition․ The camera accepts Olympus OM lenses, offering versatility․ A manual adapter enables full manual control for experienced users․
Specifications include a center-weighted metering system for accurate exposure readings․ It uses two LR44 batteries; Shutter speeds range from 1 second to 1/1000th of a second in automatic mode․ The camera also features a self-timer and compatibility with various accessories like winders and flashes․
Its compact and lightweight design makes it ideal for everyday use․ The OM10 is known for its reliability and ease of use․ It is a great choice for both beginners and experienced photographers․
Basic Operation
The Olympus OM10 is easy to use․ Key steps involve loading film, setting the ISO, and utilizing the built-in light meter for proper exposure․ Understanding these basics ensures successful photography․
Loading Film
To load film into your Olympus OM10, begin by opening the camera back using the rewind knob․ Gently pull up on the knob to release the back latch․ Insert the film cartridge into the film chamber on the left side of the camera, ensuring it sits securely․
Next, thread the film leader across the camera body and insert it into one of the take-up spool slots․ Advance the film using the film advance lever and check that the film is properly engaged and moving smoothly․ Close the camera back until it clicks shut․
Continue advancing the film lever a couple of times until the frame counter displays “1”․ Your OM10 is now ready for shooting․ Remember to set your ISO accordingly!
Setting the ISO
Setting the correct ISO on your Olympus OM10 is crucial for proper exposure․ Locate the ISO dial, typically found around the rewind knob․ Lift and turn the dial to align the desired ISO value with the indicator mark․ The ISO setting should match the ISO rating of the film you are using․
For example, if you are using ISO 400 film, set the dial to 400․ This ensures the camera’s light meter accurately measures light and adjusts the exposure settings accordingly․ Always double-check the ISO setting before shooting, especially when switching between different film speeds․ Incorrect ISO settings can lead to over or underexposed photographs․ Proper ISO setting is key!
Using the Light Meter
The Olympus OM10 features a built-in light meter to assist in achieving proper exposure․ To use it, first, ensure the camera is powered on․ Then, half-press the shutter button to activate the meter․ Look through the viewfinder; you’ll see a needle moving along a scale․ This indicates the light meter’s reading․
In automatic mode, the camera will select the appropriate aperture based on the light meter’s reading․ If the needle is centered, the exposure is correct․ If it’s too high or low, adjust your composition or wait for better lighting․ The OM10 uses a center-weighted metering system, so it prioritizes the light in the center of the frame․ Understanding and using the light meter effectively ensures well-exposed images․
Manual Mode and Adapter
To unlock full creative control, the Olympus OM10 requires a manual adapter․ This allows you to set both the shutter speed and aperture, overriding the camera’s automatic mode for customized exposures․
Understanding the Manual Adapter
The Olympus OM10, by default, operates in aperture-priority automatic mode․ To gain complete command over your photography, understanding the manual adapter is crucial․ This small but essential accessory plugs into the front of the camera, near the lens mount, enabling manual shutter speed selection․
Without the manual adapter, the OM10 relies solely on its internal light meter to determine the appropriate shutter speed for a given aperture․ The adapter essentially bypasses this automation, granting you the freedom to choose the exact shutter speed you desire, fostering creative control over motion blur and depth of field․
The adapter features a dial that allows you to select from a range of shutter speeds, typically from 1 second to 1/1000th of a second, plus Bulb mode for long exposures․ Familiarizing yourself with this adapter is paramount for exploring advanced photographic techniques with the OM10․
Setting Shutter Speed and Aperture Manually
To fully utilize the Olympus OM10 in manual mode, you’ll need the manual adapter․ Once attached, you can directly set the shutter speed using the dial on the adapter․ Rotate the dial to your desired shutter speed, considering the lighting conditions and your creative intent․
Next, adjust the aperture on the lens itself․ The aperture controls the amount of light entering the camera and influences the depth of field․ A wider aperture (smaller f-number) creates a shallow depth of field, ideal for portraits, while a narrower aperture (larger f-number) yields a greater depth of field, suitable for landscapes․
Use the OM10’s built-in light meter as a guide․ Look through the viewfinder and observe the meter needle․ Adjust either the shutter speed or aperture until the needle aligns with the center mark, indicating proper exposure․ Experimentation is key to mastering manual exposure and achieving your desired results․
Troubleshooting
Encountering issues with your Olympus OM10? This section addresses common problems, such as film loading errors, exposure inaccuracies, and mechanical malfunctions․ Find solutions and tips to resolve these issues․
Common Issues and Solutions
One frequent problem with the Olympus OM10 is incorrect exposure readings․ This often stems from aged or faulty light meter cells․ Ensure your batteries are fresh LR44 type․ If the meter still acts erratically, consider using an external light meter or the Sunny 16 rule for manual exposure settings․
Another issue is film advance malfunctions․ Check that the film is loaded correctly and that the take-up spool is engaging properly․ Avoid forcing the film advance lever, as this can damage the mechanism․ If problems persist, the camera might need professional servicing․
Furthermore, sticky shutter release can occur due to dirt or old lubricants․ Try gently cleaning around the shutter button․ If this doesn’t help, a CLA (Clean, Lube, Adjust) service is recommended to restore smooth operation․
Care and Maintenance
Proper care extends your Olympus OM10’s life․ Routine cleaning and careful handling prevent issues․ Store it in a cool, dry place․ This ensures optimal performance and longevity for your camera․
Storage and Handling
Proper storage and handling are crucial for maintaining your Olympus OM10’s condition․ When storing the camera, ensure it’s in a cool, dry place away from direct sunlight and extreme temperatures; Remove the batteries to prevent corrosion, which can damage the camera’s internal components over time․
Always handle the OM10 with care․ Avoid dropping or bumping the camera, as this can misalign the delicate internal mechanisms or damage the lens mount․ When changing lenses, do so in a clean environment to prevent dust and debris from entering the camera body․
Regularly clean the lens with a soft, lint-free cloth to remove fingerprints and smudges․ For more stubborn dirt, use a specialized lens cleaning solution․ Protect the lens with a lens cap when not in use to prevent scratches and dust accumulation․ These precautions will help ensure the longevity and optimal performance of your Olympus OM10․
Available Resources
Explore a wealth of available resources to enhance your Olympus OM10 experience․ These include downloadable manuals, online guides, and repair services to support your photographic journey with this classic camera․
Downloadable Manuals and Guides
Access a variety of downloadable resources to assist with your Olympus OM10․ Official instruction manuals, often available in PDF format, provide comprehensive guidance on camera operation, settings, and features․ These manuals cover everything from basic functions to advanced techniques, including the use of the manual adapter․
Online guides and tutorials offer additional support, often featuring user tips, troubleshooting advice, and creative photography ideas․ Explore websites dedicated to classic cameras for repair manuals and community forums where you can find answers to specific questions․ By utilizing these downloadable resources, you’ll be well-equipped to master the Olympus OM10․